Three.js 是一个3d的基础库,学习它可以帮助我们打开3d的大门。
说在前面的话
由于学习图形学需要很深的数学基础,才能理解原生API的使用,这导致对于普通程序员来说学习成本太大。而Threejs 很友好的封装了原生API,通过对数据结构和设计模式的封装,以一个更利于理解的角度阐述了3D世界,所以我打算先从Threejs开始学习,由浅入深理解原理。
Three.js 的重要概念
主要概念:
- 渲染器
- 相机
- 几何体
- 光照
辅助工具:
- 动画函数
- 用户界面操作库
- 帧率监控库
一道简单的开胃菜
<html>
  <style>
       body {
       /* set margin to 0 and overflow to hidden, to go fullscreen */
         margin: 0;
         overflow: hidden;
       }
  </style>
<body>
  <div id='WebGL-output'></div>
  <script src="./src/index.ts"></script>
</body>

</html>
复制代码
import { Scene,WebGL1Renderer,PerspectiveCamera, Color, AxesHelper} from "three";

window.onload = init;

function init() {
  const renderer = new WebGL1Renderer();
  const scene = new Scene();
  const camera = new PerspectiveCamera();
  // render the scene
  renderer.setSize(window.innerWidth, window.innerHeight);
  renderer.setClearColor(new Color(0xEEEEEE));
  camera.lookAt(scene.position);
  renderer.render(scene, camera);
  // add the output of the renderer to the html element
  document.getElementById("WebGL-output").appendChild(renderer.domElement);
}
复制代码
上述代码里面已经基本包含了Threejs的核心三要素;渲染器(WebGL1Renderer),照相机(PerspectiveCamera),场景(Scene);
照相机: 是一个视角的概念,就是你看到的东西;camera.lookAt 表示你朝那个方向看。由于我们在一个3D世界,所以就算不站着不动,只要你原地旋转,看的东西也是不一样的。
场景: 类似画布的概念,就是你想在画布上放些啥。
渲染器: 渲染虚拟物体的载体。只有将场景和相机扔给渲染器渲染;显示器才能展示真实的物体。
理解了上面的概念,运行上面的代码发现页面中并没有任何东西。那是因为我们没有往场景中添加东西。添加了东西我们就可以物体了。
理解坐标系
在3D世界中,有一个三维坐标系的概念。坐标系就是代表物体在虚拟世界的位置。有了他,我们就很容易找到自己的位置,不容易迷失方向
接着上面的例子,我们把辅助坐标系添加到场景中,并调整相机的视角,这样在页面中就可以看到坐标系了。
import { Scene,WebGL1Renderer,PerspectiveCamera, Color, AxesHelper} from "three";

function init() {
  const renderer = new WebGL1Renderer();
  const scene = new Scene();
  const camera = new PerspectiveCamera();
  // render the scene
  renderer.setSize(window.innerWidth, window.innerHeight);
  renderer.setClearColor(new Color(0xEEEEEE));
  // position and point the camera to the center of the scene
  camera.position.x = -40;// 红线是X轴
  camera.position.y = 30; // 蓝线是y轴
  camera.position.z = 30; // 绿线是Z轴

  // show axes in the screen
  const axes = new AxesHelper(10);
  scene.add(axes);
  console.log(scene.position);

  camera.lookAt(scene.position);
  renderer.render(scene, camera);

  // add the output of the renderer to the html element
  document.getElementById("WebGL-output").appendChild(renderer.domElement);
}

 window.onload = init;
复制代码
注意点:调整相机的视角,就相当于调整眼睛看的方向。
页面的效果:
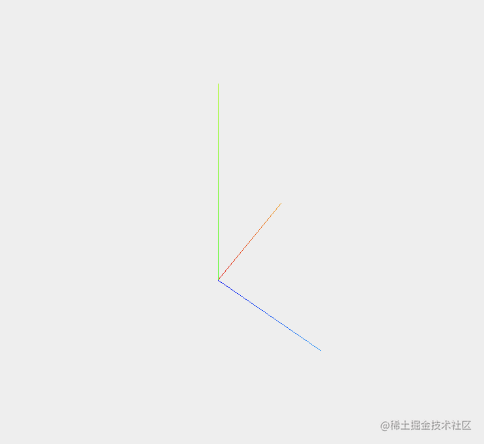
我们分别看到了红线,蓝线,绿线,分别对应X轴,Y轴,Z轴。
源码: github.com/hpstream/th…
代码演示: hpstream.github.io/three-demo/…
了解几何体(Geometry)
几何体是数学中的概念,如:球体,立方体,平面体。它本质上是一种对现实的抽象。像现实中的球,抽象成数学概念就是球体,那么球,和球体存在着什么联系呢?
个人理解:
球体(几何体) + 材料(材质) = 球(实体)
代码的展示形式:
 var shpereGeometry = new SphereGeometry(8,20,20)
 var shpereMeterial = new MeshBasicMaterial({color:0x7777ff,wireframe:true})
 var shpere = new Mesh(shpereGeometry,shpereMeterial)

 shpere.position.x = -10;
 shpere.position.y = 10;
 shpere.position.z = -10;
复制代码
通过 SphereGeometry 创建几何体的骨架,MeshBasicMaterial 创建材质, 通过材质和骨架的组合,就可以创建一个球。通过调整位置,让球在我们创造的虚拟世界移动。
学会使用常见的几何体
import { Scene,WebGL1Renderer,PerspectiveCamera, Color, AxesHelper, PlaneGeometry, MeshBasicMaterial, Mesh, BoxGeometry, SphereGeometry} from "three";

let renderer: WebGL1Renderer, scene: Scene, camera: PerspectiveCamera;

function paintGeometry() {
   // 绘画一个灰色,平面几何体
   const planeGeometry = new PlaneGeometry(20, 20);
   const planeMaterial = new MeshBasicMaterial({ color: 0xcccccc });
   var plane = new Mesh(planeGeometry, planeMaterial);
   plane.rotation.x = -0.5 * Math.PI;
   scene.add(plane);
   // 绘画一个立方体
   var cubeGeometry = new BoxGeometry(4,4,4)
   var cubeMaterial = new MeshBasicMaterial({color:0xff0000,wireframe:true})
   var cube = new Mesh(cubeGeometry,cubeMaterial)
   cube.position.x = 2;
   cube.position.y = 2;
   cube.position.z = 2;
   scene.add(cube)
	   // 绘画一个球体
   var shpereGeometry = new SphereGeometry(8,20,20)
   var shpereMeterial = new MeshBasicMaterial({color:0x7777ff,wireframe:true})
   var shpere = new Mesh(shpereGeometry,shpereMeterial)
   shpere.position.x = -10;
   shpere.position.y = 10;
   shpere.position.z = -10;
   scene.add(shpere);
}

function init() {
  //...
  //...
  paintGeometry();

 // ...
  document.getElementById("WebGL-output").appendChild(renderer.domElement);
}

window.onload = init;
复制代码
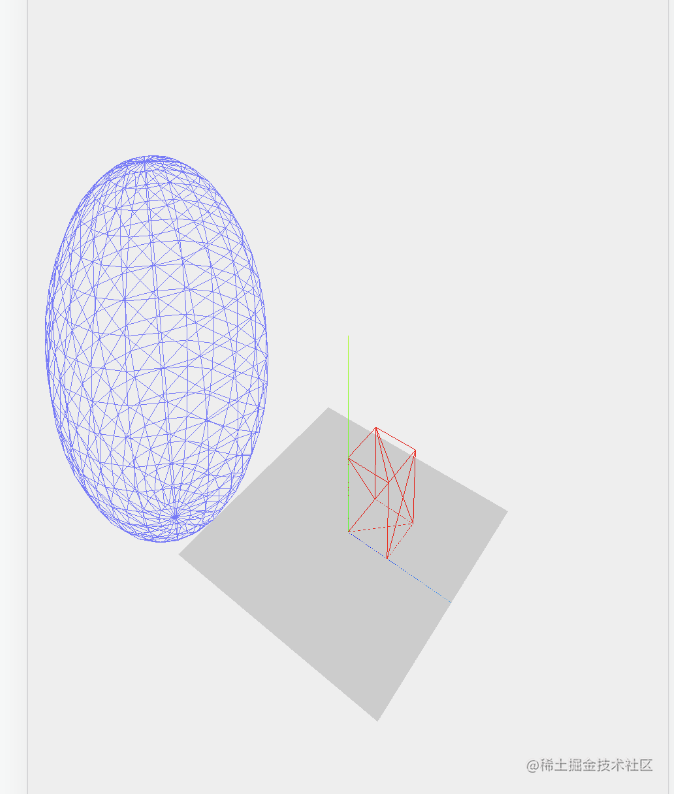
scene.add(cube); 将立方体放进场景中
案例图:
源码: github.com/hpstream/th…
代码演示: hpstream.github.io/three-demo/…
光照与反光材料
光打在物体上,我们就能看到物体的反射的光,其实在3D的虚拟世界,也是一样可以看到的。只不过我们需要使用光源和特殊的反光材料才能实现。
const spotLight = new SpotLight(0xffffff);
spotLight.position.set(-40, 60, -10);
spotLight.castShadow = true;
scene.add(spotLight);


var cubeGeometry = new BoxGeometry(4, 4, 4);
// 反光材料
var cubeMaterial = new MeshLambertMaterial({
    color: 0xff0000,
   //  wireframe: true,
});
var cube = new Mesh(cubeGeometry, cubeMaterial);
复制代码
SpotLight 创建一个点光源,放入场景中, 将立方体的材质换成可以反光的MeshLambertMaterial材质,就可以看到光照的效果了。
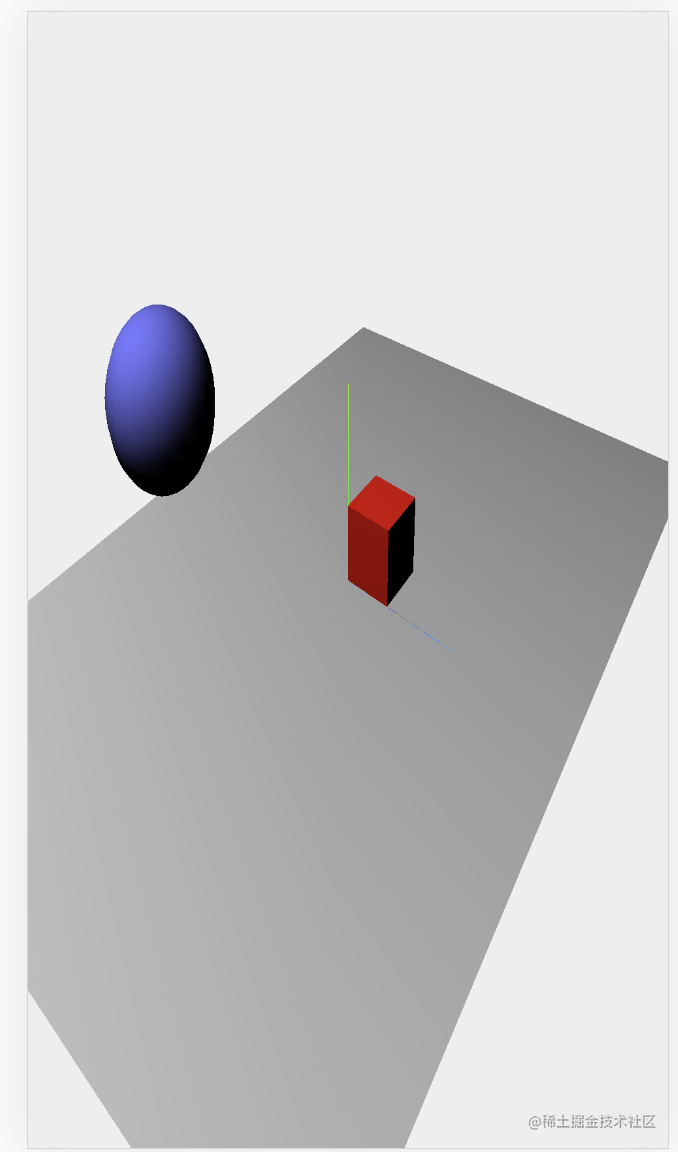
源码: github.com/hpstream/th…
代码演示: hpstream.github.io/three-demo/…
动画与辅助函数的使用
requestAnimationFrame 是浏览器提供的一个动画函数,我们可以使用这个函数制动动画效果,其基本思路就是在每一帧改变物体的位置,这样子连续的看起来就是动画了。
function renderScene() {
    cube.rotation.x += 0.2;
    cube.rotation.y += 0.2;
    cube.rotation.z += 0.2
    // render using requestAnimationFrame
    requestAnimationFrame(renderScene);
    renderer.render(scene, camera);
  }
复制代码
通过 requestAnimationFrame 不停的让几何体旋转起来。就可以看到动画了。
由于动画可能会影响页面帧率,导致页面卡顿,所以我们在最好有一个工具可能检测浏览器的刷新频率,我们使用stats.js来监听页面的帧率
import Stats from "stats.js";


function initStats() {
  stats = new Stats();
  stats.showPanel(2); // 0: fps, 1: ms
  stats.dom.style.position = "absolute";
  stats.dom.style.left = "0px";
  stats.dom.style.top = "0px";

  document.getElementById("Stats-output").appendChild(stats.dom);

  return stats;
}

 function renderScene() {
    stats.update();
    // ...
    // ...
    renderer.render(scene, camera);
  }
复制代码
我们在做动画时,可能经常需要调整几何体的位置参数。但是频繁改动代码显得非常麻烦,而dat.gui 这个库可以很友好的帮助我们在页面修改参数,看页面效果。
import * as dat from "dat.gui";
const gui = new dat.GUI();
var controls = new (function () {
  this.rotationSpeed = 0.02;
  this.bouncingSpeed = 0.03;
})();
 gui.add(controls, "rotationSpeed", 0, 0.5);
 gui.add(controls, "bouncingSpeed", 0, 0.5);


function renderScene() {
    stats.update();
    cube.rotation.x += controls.rotationSpeed;
    cube.rotation.y += controls.rotationSpeed;
    cube.rotation.z += controls.rotationSpeed;

    // bounce the sphere up and down
    step += controls.bouncingSpeed;
    sphere.position.x = 0 + 10 * Math.cos(step);
    sphere.position.y = 2 + 10 * Math.abs(Math.sin(step));
    // render using requestAnimationFrame
    requestAnimationFrame(renderScene);
    renderer.render(scene, camera);
}
复制代码
案例示意图:
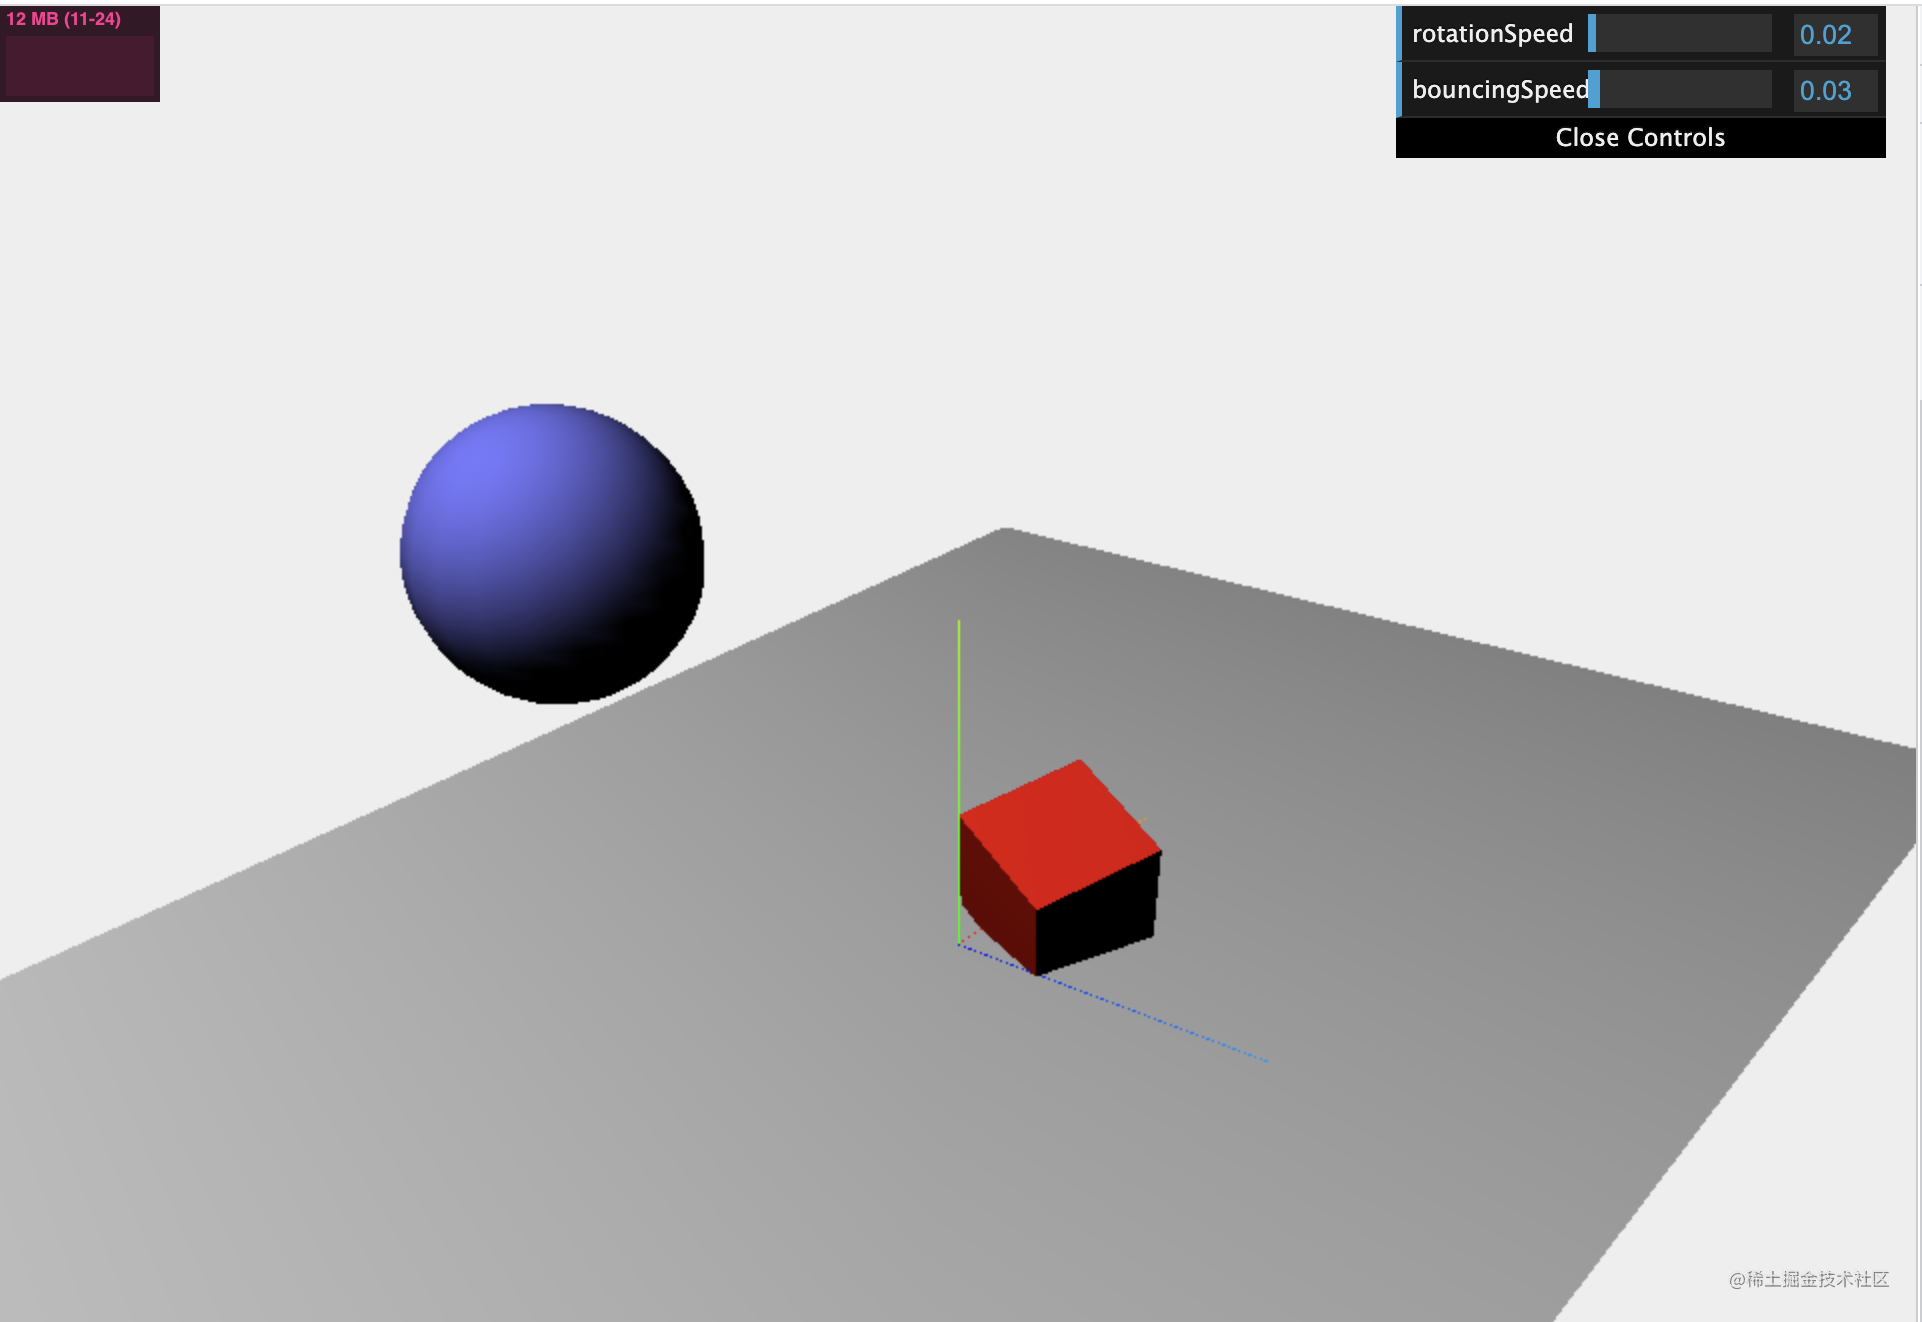
源码: github.com/hpstream/th…
代码演示: hpstream.github.io/three-demo/…
总结
通过上面知识点的讲解,我们理解了3D世界的基本要素,和一些辅助工具。基本上算是打开了我们3D世界的大门。接下来我会对每一个要素展开讲解,尽情期待吧。